

The first time you see the northern lights, you may not believe your eyes. A faint cloud on the horizon slowly brightens, stretches into a ribbon, and begins to move across the sky like smoke in the wind. If you have never chased the aurora before, a Beginners Guide for Aurora Viewing in Yukon (4 days) can save you time, stress, and a few cold toes.
This guide covers the basics: what the aurora is, when and where to look, how to plan four days, what to wear, and how to take decent photos without expensive gear.
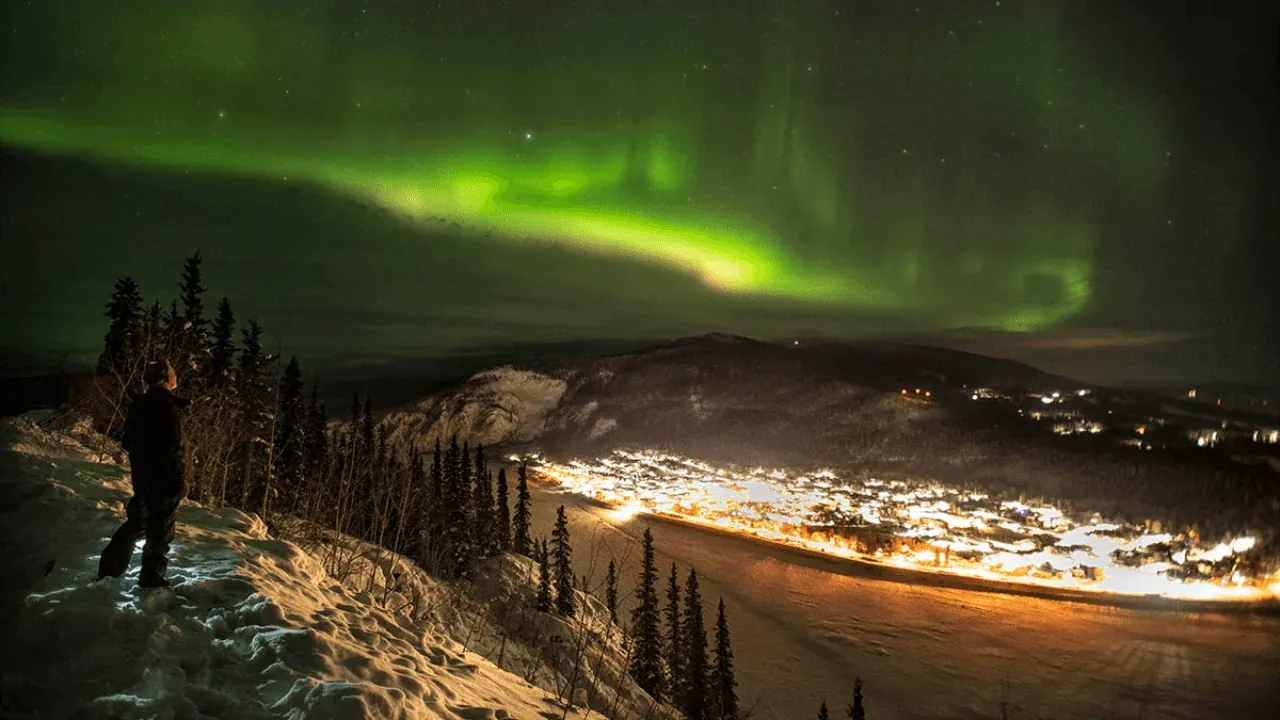
What Exactly Is the Aurora?
The aurora, also called the northern lights or aurora borealis, happens when charged particles from the sun collide with gases in Earth’s upper atmosphere. The collisions release light, most often a soft green, sometimes with pink, red, or purple. The magnetic field funnels these particles toward the polar regions, which is why the show appears in the far north.
The Yukon lies beneath the auroral oval, the ring-shaped zone around the magnetic pole where activity is strongest. Add dark skies, dry air, and open wilderness, and you have excellent conditions for first-time viewers.
Why Choose Yukon as a Beginner?
You do not need a remote expedition to see the lights here. Whitehorse, the capital, has an airport, hotels, restaurants, and dark viewing locations within a short drive. Guided tours handle the logistics, so you can concentrate on the sky.
Four days is also a smart length for a first attempt. It gives you several evenings to try, which matters because the aurora cannot be scheduled. One cloudy night should not ruin your trip.
When Is the Best Time to See the Aurora?
Aurora season in the Yukon generally runs from late August to mid-April. You need darkness, so mid-summer is not suitable.
Late August to September. Nights are dark again, temperatures are mild, and lakes may reflect the lights. A good choice if you dislike deep cold.
October and November. Growing darkness, early snow, and fewer crowds.
December to February. The longest nights and coldest weather. Very atmospheric, but you must dress carefully.
March to mid-April. Many travelers love this window. Skies are often clear, temperatures are gentler, and activity can be strong around the equinox.
Within each night, the best viewing window is usually between 10 p.m. and 2 a.m., though the aurora can appear earlier or later.
Understanding the Basics: Darkness, Clear Skies, and the Moon
Three things matter most for beginners:
-
Darkness. Get away from streetlights and building glow.
-
Clear skies. Clouds block the view completely, so check the forecast each day.
-
The moon. A bright full moon can wash out fainter displays. A new moon or thin crescent is ideal.
Solar activity matters too, but you cannot control it. Many forecasting tools show an activity index, often called Kp. Higher numbers mean stronger activity, but in the Yukon you can see the lights even at modest levels, because you are already close to the auroral oval. Treat the forecast as a hint, not a promise.
A Sample Four-Day Plan for First-Timers
Tours differ, but this rhythm works well.
Day 1: Arrive and adjust. Land in Whitehorse, check in, and take a short walk to feel the air. Eat an early dinner, rest, and review the sky forecast. If it looks clear, join a first-night tour or step outside to a dark spot.
Day 2: Daytime activity, night viewing. Spend the day relaxing or enjoying a gentle outing, such as a river walk, a museum, or a hot spring visit. Nap in the afternoon so you are alert at night. After dinner, head out on a guided aurora tour with a heated shelter and hot drinks.
Day 3: A flexible day. Use the weather as your guide. If Day 2 was cloudy, repeat or extend the viewing. If you saw a good display, you might add a daytime activity such as snowshoeing, dog sledding, or a scenic drive in winter, or a hike in autumn.
Day 4: Last chance and farewell. Enjoy a slow breakfast and a relaxed morning. If your flight is later, you may squeeze in one more outing. If it is early, make Night 3 your final aurora attempt.
A good operator may adjust the schedule depending on the weather. That flexibility is worth more than a perfect itinerary on paper.
What the Aurora Really Looks Like
This surprises many beginners. Photos online often show vivid green and purple ribbons, but your eyes may see something softer. The aurora can look like a pale gray or green cloud at first. Brighter displays reveal moving curtains and pulses, and strong nights can show pink or violet edges.
Cameras collect light for several seconds, so their images are usually more colorful than real life. That does not mean the experience is disappointing. Many viewers say the movement and silence are the real magic. Do not leave early just because the first few minutes are quiet.
What to Wear for Aurora Nights
Standing still in the dark is much colder than walking around by day. Dress in layers and prioritize warmth over style.
-
Insulated, waterproof boots with warm socks
-
Thermal base layers made of wool or synthetic fabric
-
A fleece mid-layer and a heavy winter jacket
-
Insulated pants, a warm hat, and a neck gaiter
-
Liner gloves plus insulated mittens
-
Hand and toe warmers
-
A thermos with a hot drink
In autumn, nights can be cooler than you expect, so still bring a warm jacket. Many tour companies lend winter clothing, so check before you pack.
Simple Photography Tips for Beginners
You do not need professional equipment, but a few basics help.
-
Use a tripod or rest your camera on a stable surface.
-
Switch to manual mode if your camera allows it.
-
Use a wide-angle lens and a wide aperture.
-
Try an exposure of 5 to 15 seconds, then adjust.
-
Turn off the flash and focus manually on a distant star.
-
On a smartphone, use night mode and keep still.
-
Keep a spare battery warm in an inner pocket.
Remember to put the camera down now and then. The memory you keep with your own eyes is often the best one.
Common Beginner Mistakes to Avoid
-
Giving up too early. Auroras often come in waves. Stay out a little longer.
-
Staying in the city. Light pollution hides faint displays.
-
Dressing too lightly. Cold shortens everyone’s patience.
-
Relying only on forecasts. Look at the real sky as well.
-
Booking only one night. More nights mean better odds.
How to Choose a Beginner-Friendly Tour
Look for small groups, heated shelters, friendly guides, and clear information about what happens if the sky is cloudy. Ask whether hotel pickup is included and whether cameras or tripods are available. A tour with a rebooking or second-attempt policy is especially useful for first-timers.
Frequently Asked Questions
Is four days enough to see the aurora in Yukon?
It is a good window. In season, many travelers see the lights within three or four nights, though nothing is guaranteed.
Do I need a car?
No. Most tours provide pickup and transport.
Is it suitable for children and older travelers?
Usually yes, as long as everyone dresses warmly. Ask your operator about age limits and comfort breaks.
Can I see the aurora from my hotel?
Sometimes, especially during strong activity, but city lights reduce visibility. A dark site is much better.
Final Thoughts
A Beginners Guide for Aurora Viewing in Yukon (4 days) comes down to a few simple ideas: choose the right season, give yourself several nights, stay warm, and let the sky surprise you. You do not need to be an expert. You only need patience, a warm coat, and a willingness to look up. When the first green ribbon appears, you will understand why people travel so far for this moment.